
DIY cloud backup: Installing and configuring the server
Now that we have all the hardware (Server, USB3 disk cabinet and disks) we need to set it all up! This post will guide you through installing Ubuntu, setting up the storage and configuring the Minio S3 backend including how to deal with multiple tenants.
Connecting the hardware
Physically installing the server is quite easy. Just take the server and the disk cabinet out of the box and connect their adapters. Then connect them together with the supplied USB3 cable and insert the disks into the disk cabinet.
I strongly advise to hook up the server with a cabled connection to the internet. WiFi is fine and all but for something that’s going to stay in one place, a cable is always better.
Once that is all done, turn it on and boot into the supplied Windows 10 to see if everything is working.
Create a Ubuntu bootable USB stick
If everything is working, using the system (or a different PC), download the Ubuntu 16.04 LTS Server netinstall ISO image and downloada tool called Rufus. Use Rufus to flash a USB stick (min 64MB) with the Netinstall ISO.
Newer versions of Ubuntu might also work but the install guide is based on the Long-Term Support version 1.6.04.
Boot from USB stick to install Ubuntu
*Since I don’t currently have the hardware yet and it’s hard to take a screenshot of a physical screen, all next steps are performed in a virtual environment, any changes necessary will be updated in the future!
Installing Ubuntu to internal 32GB eMMC
Insert/Mount the USB stick/ISO and boot the server from it.
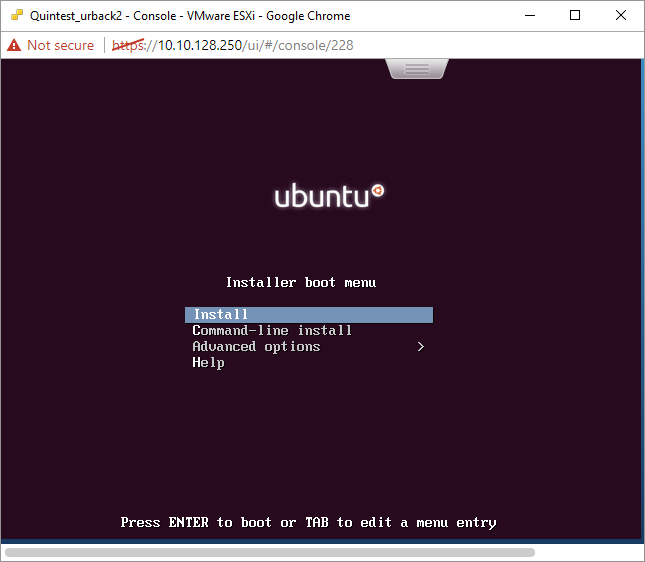
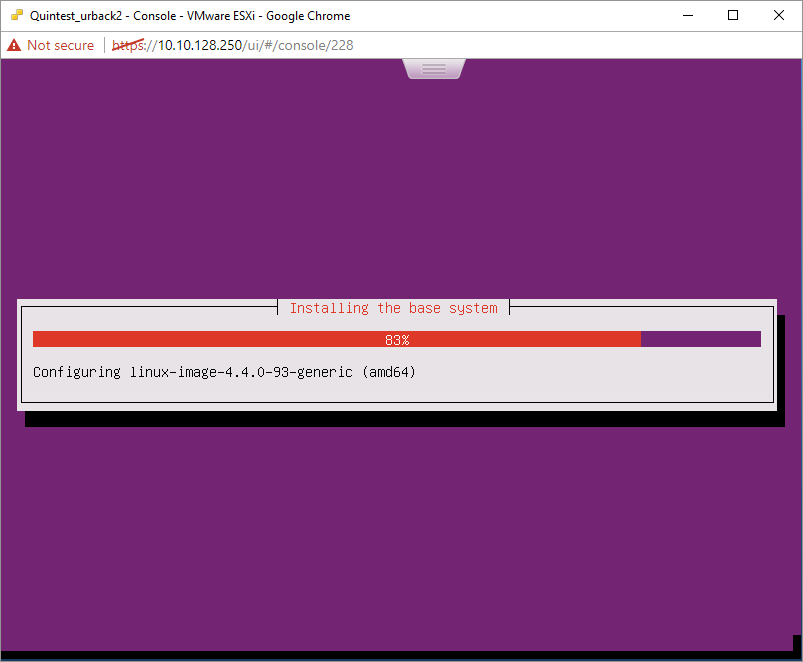
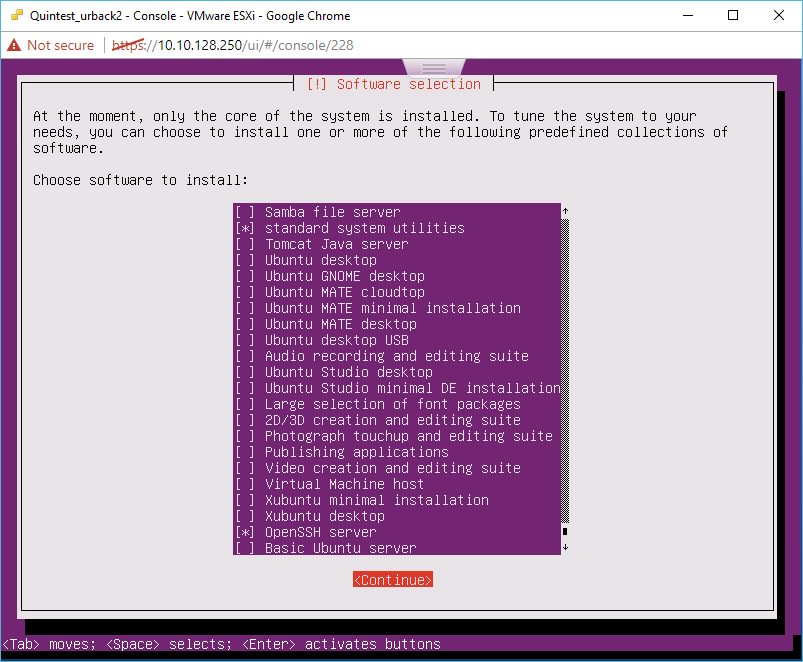
After first boot, install basic packages
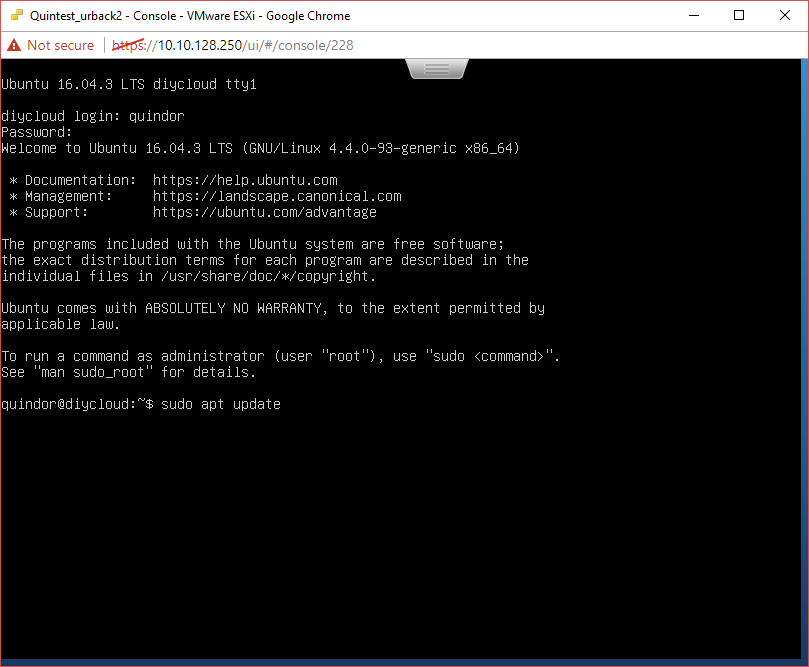
<pre class="EnlighterJSRAW" data-enlighter-language="shell">sudo apt update
sudo apt-dist upgrade
```[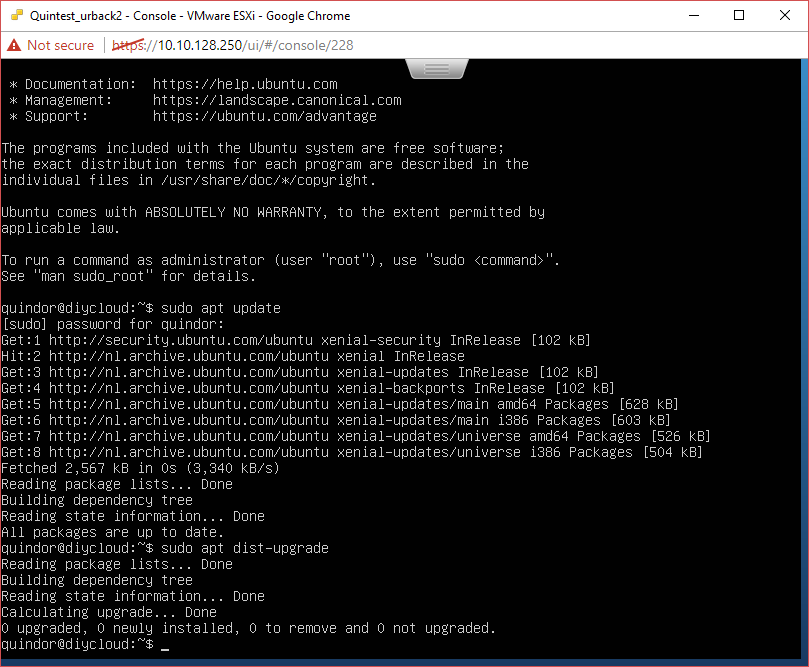](http://blog.quindorian.org/wp-content/uploads/2017/08/6-1.png)Updating all done, let’s continue##
#
##
# Finding the current DHCP address
Since this is a 24Hr server which is going to need some firewall port-maps to function remotely we need it to have a set IP address instead of a DHCP address to make sure it doesn’t change over time.
[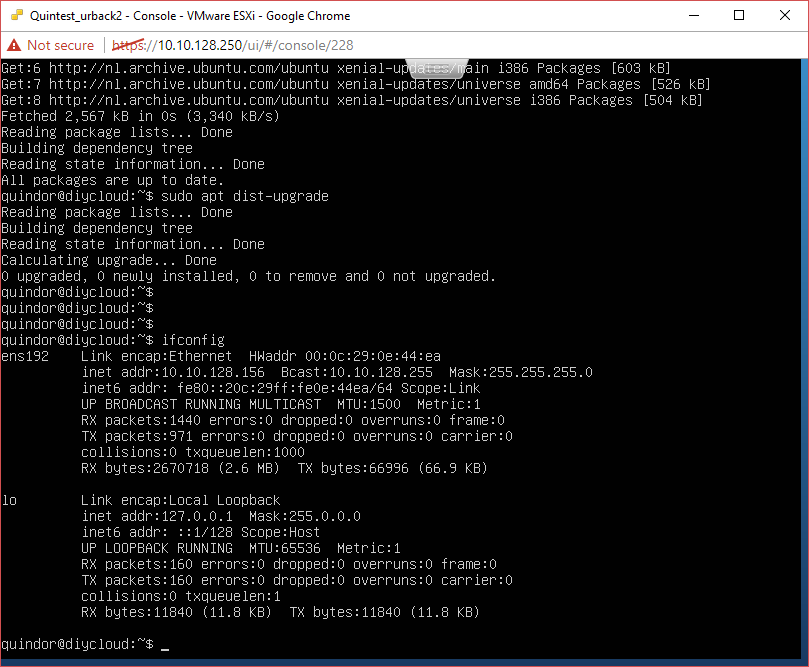](http://blog.quindorian.org/wp-content/uploads/2017/08/7.png)Using ifconfig we can find the current DHCP address, let’s try and connect with SSH`<pre class="EnlighterJSRAW" data-enlighter-language="null">ifconfig`Connect to the machine using an SSH client like Putty.
[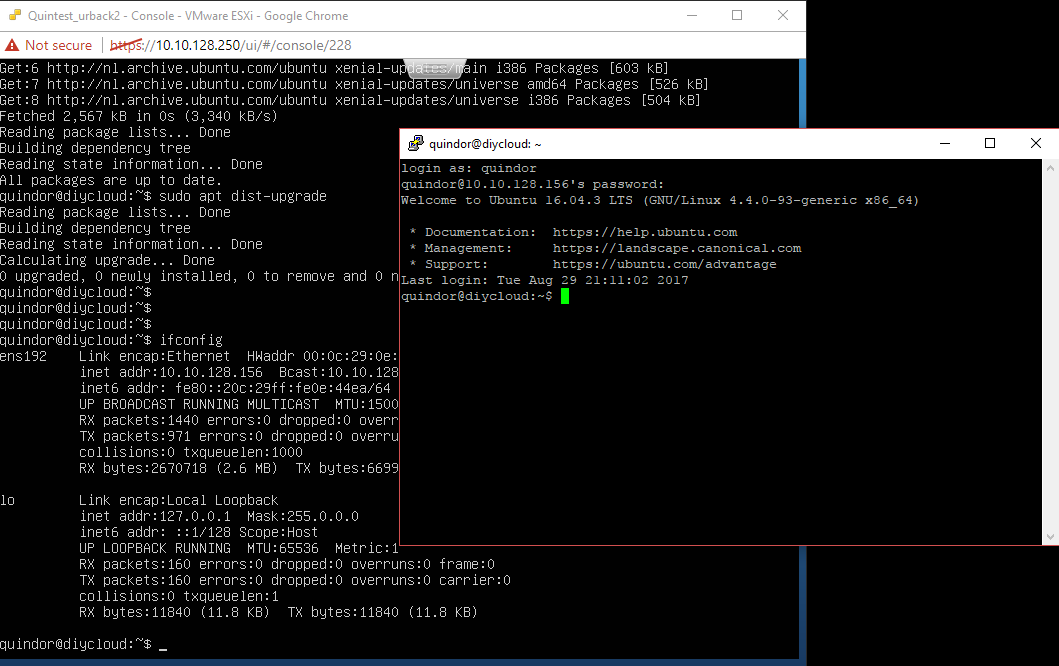](http://blog.quindorian.org/wp-content/uploads/2017/08/remotessh.png)It worked, we’re logged in over SSH using Putty from our workstation. At this point you’ll be able to ditch the remote console or keyboard and monitor on the server and you can work remotely##
# Installing needed packages
We need to get some packages that we’re going to use on the server. These are just the bare basics. In another post I’ll be discuss adding more advanced functions such as monitoring and other extra’s.
[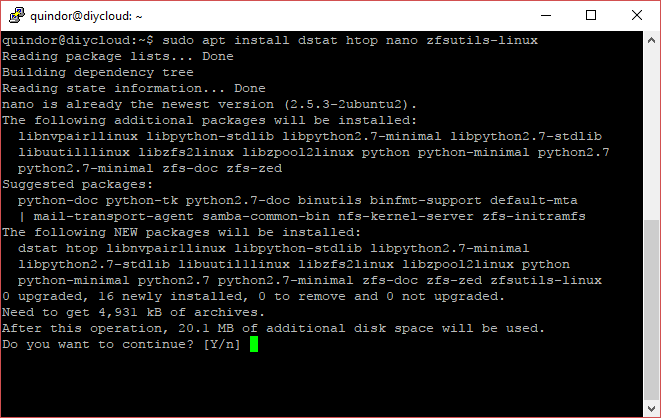](http://blog.quindorian.org/wp-content/uploads/2017/08/9.png)Installing packagesTo install the packages, run the following command:
`<pre class="EnlighterJSRAW" data-enlighter-language="null">sudo apt install dstat htop nano zfsutils-linux`##
# Setting a new dedicated IP
To set a new dedicated IP, do the following:
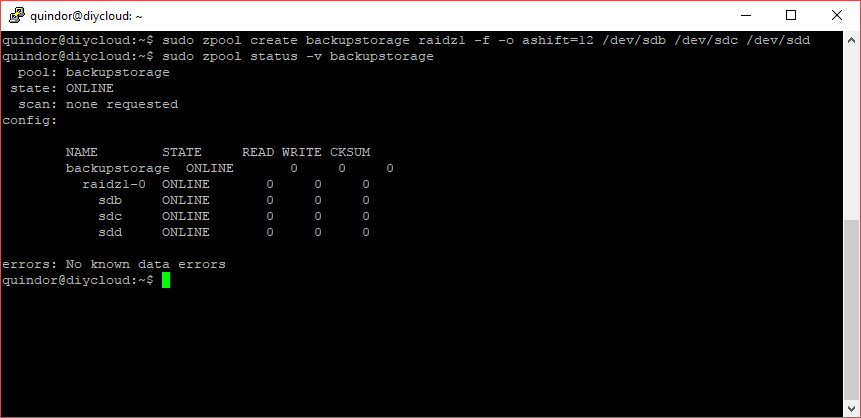
cd /etc/network sudo nano interfaces ```Edit the interfaces file to contain the below listed text. Caution, the ensl92 interface is what the network interface in my VM is called, in your case there should be a different name, make sure to use that! Edit the file to contain the following instead of “auto”.<pre class="EnlighterJSRAW" data-enlighter-language="null">auto ensl92 iface ensl92 inet static address ip.ip.ip.ip netmask 255.255.255.0 gateway ip.of.firewall.here dns-nameservers ip.of.firewall.here ```Again, make sure to use the network card name and settings appropriate for your network! When done correctly it should look something like this: [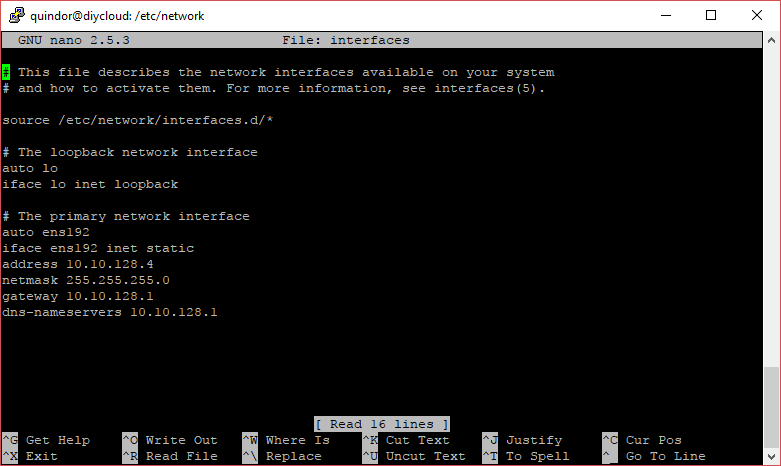](http://blog.quindorian.org/wp-content/uploads/2017/08/12.png)Netwerk settings setAfter this, reboot the system using and connect with SSH to the newly set IP. `<pre class="EnlighterJSRAW" data-enlighter-language="null">sudo reboot`## # Configuring the storage As I mentioned in the previous article I’m going to be using 3x 10TB in a RAIDz1 because I don’t except too much random I/O and I want to make the most of the available disk space. Since it’s for backup purposes only, if the server would fail because 2 HDD’s failed at the same time and all backup data would be lost, it’s highly unlikely that the original data would also be lost at exactly the same time. So in my opinion it’s a calculated risk to save some costs. First, let’s check what available storage devices we have: [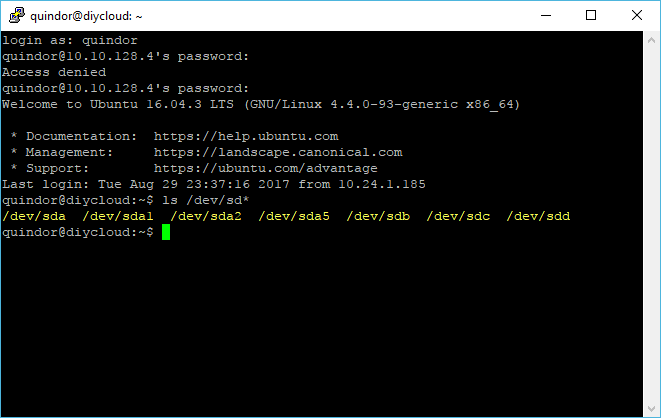](http://blog.quindorian.org/wp-content/uploads/2017/08/13.png)We see a SDA which is the OS disk in our case and the drives SDB, SDC and SDD on which we will build our backup storageWe’re going to create a RAIDz1 out of SDB, SDC and SDD. Run the commands below to create the RAIDz1 volume:sudo zpool create backupstorage raidz1 -f -o ashift=12 /dev/sdb /dev/sdc /dev/sdd sudo zpool status -v backupstorage ```After that it should look something like this:
RAIDz1 created succesfully##### Creating ZFS datasets
To be able to manage different “directories” or datasets and keep space divided between tenants we’re going to create 2 datasets:
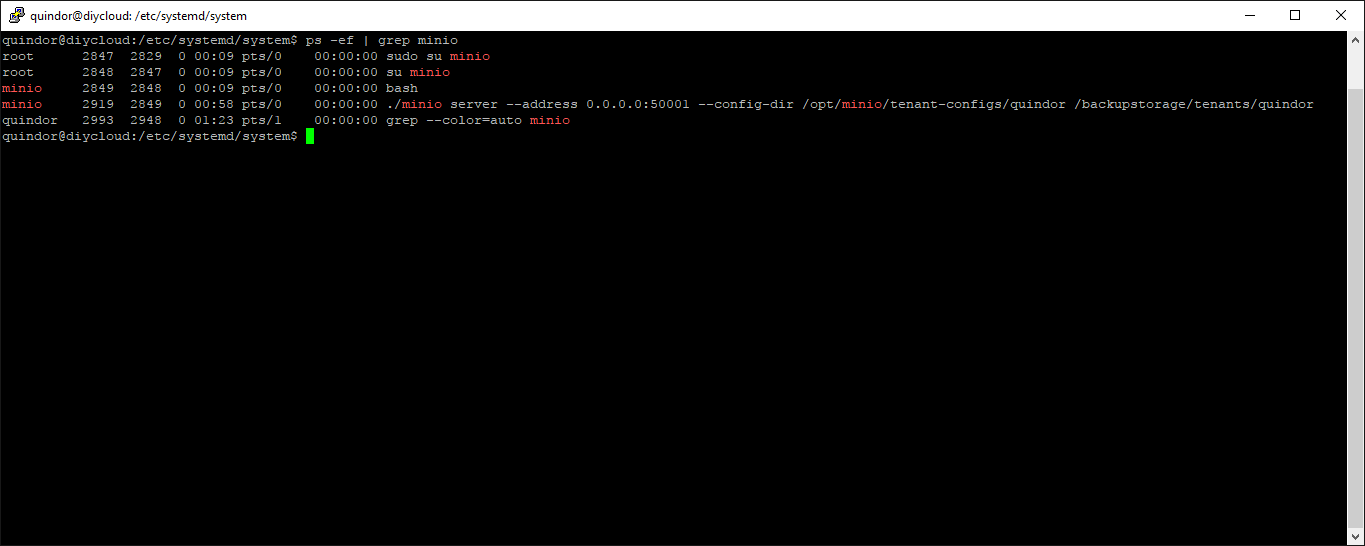
<pre class="EnlighterJSRAW" data-enlighter-language="null">sudo zfs create backupstorage/tenants sudo zfs create backupstorage/tenants/quindor ```[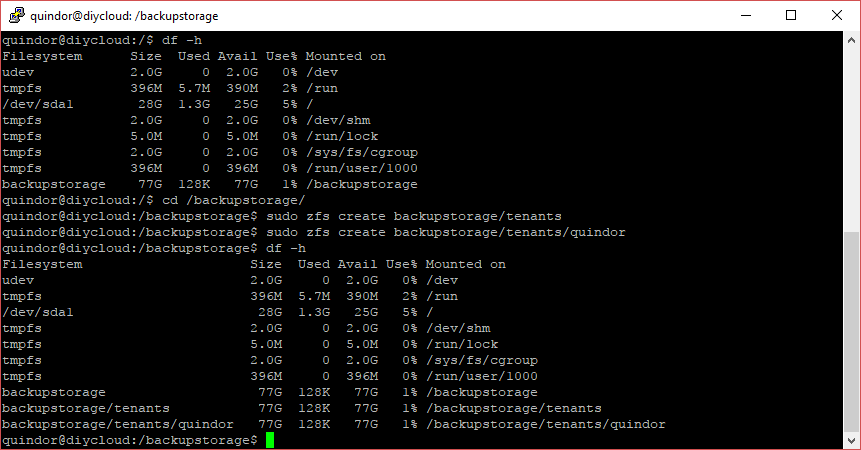](http://blog.quindorian.org/wp-content/uploads/2017/08/16.png)Storage configured and mountpoints available##### # Setting a quota on a dataset To restrict users from using too much space we’re going to use ZFS quotas on the individual datasets. To set a quota on the quindor user we just created run the following command: `<pre class="EnlighterJSRAW" data-enlighter-language="null">sudo zfs set quota=50G backupstorage/tenants/quindor`With this command the tenant Quindor will be restricted to using 50GB of data. Since these are soft quotas put on top of a larger file system they can be easily adjusted later on if needed. The Minio S3 storage backend ============================ We’ll be using a Minio S3 object storage server per tenant. ## # Separating and securing Tenants For each tenant we’ll be running a separate instance of the Minio S3 backend storage server. Each instance will have it’s own TCP port, private Access key and Secret key, separating environments between clients. [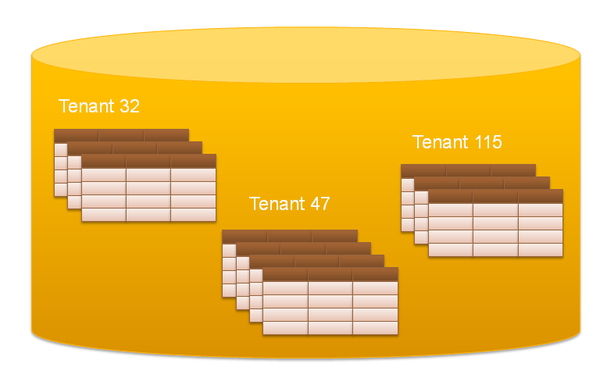](http://blog.quindorian.org/?attachment_id=2208) ##### # Security through encryption, a trust-no-one scenario Each tenant will be able to create buckets in their instance through which they can use multiple clients within their tenant account. That would mean that a client within the tenant in theory could access the data of another client, or that the server administrator could look inside of all the backups. To solve that problem, the Duplicati client software is able to perform client-side encryption. By using a different encryption key per client, no one but the possessor of that encryption key will be able to open and view the data, including other clients in the same tenant account or even the server administrator. The data structure of Duplicati even prevents the other clients or server administrator from viewing file names or metadata since everything will be stored in deduplicated and compressed block archives on the server. ## # Installing Minio for the Quindor tenant First we need to some configuration steps and then download Minio. Execute the following commands:sudo adduser minio<pre class="EnlighterJSRAW" data-enlighter-language="null">sudo su minio cd /opt/minio wget https://dl.minio.io/server/minio/release/linux-amd64/minio chmod +x minio ```[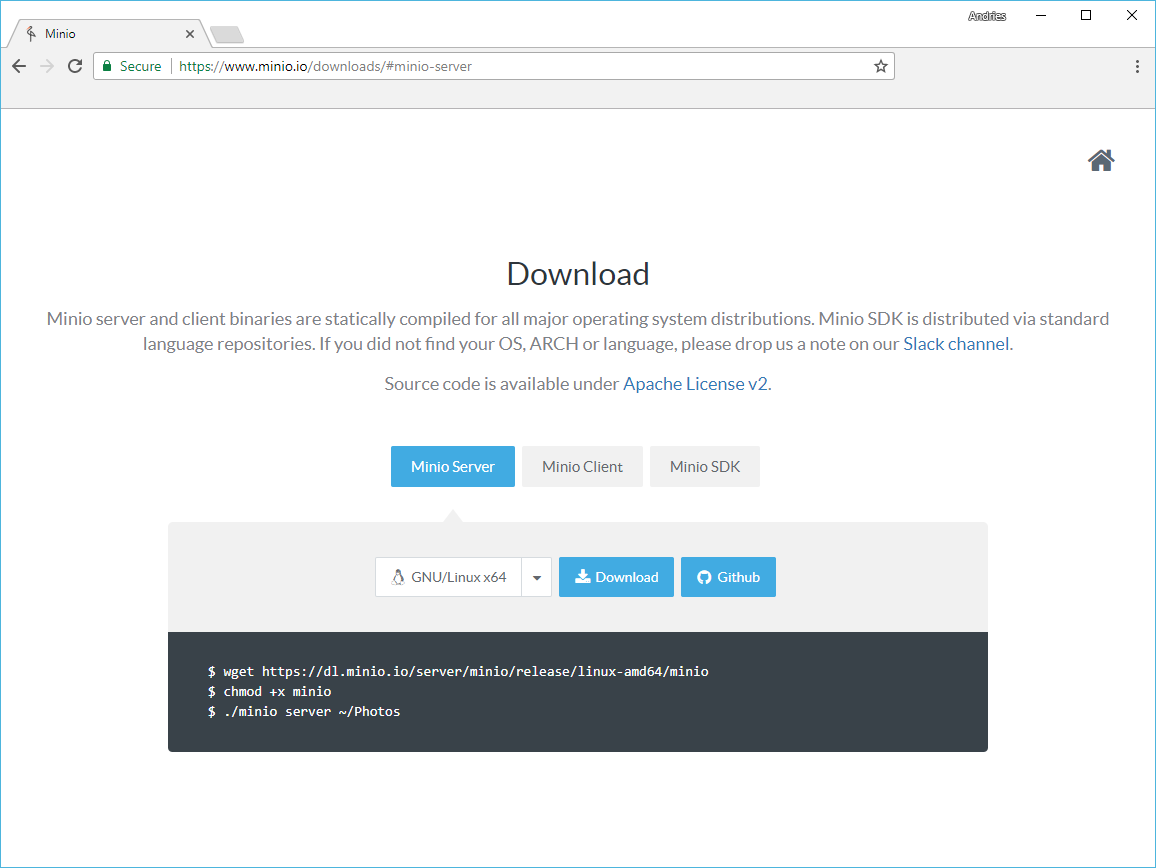](http://blog.quindorian.org/wp-content/uploads/2017/08/18.png)The Minio Cloud Storage website[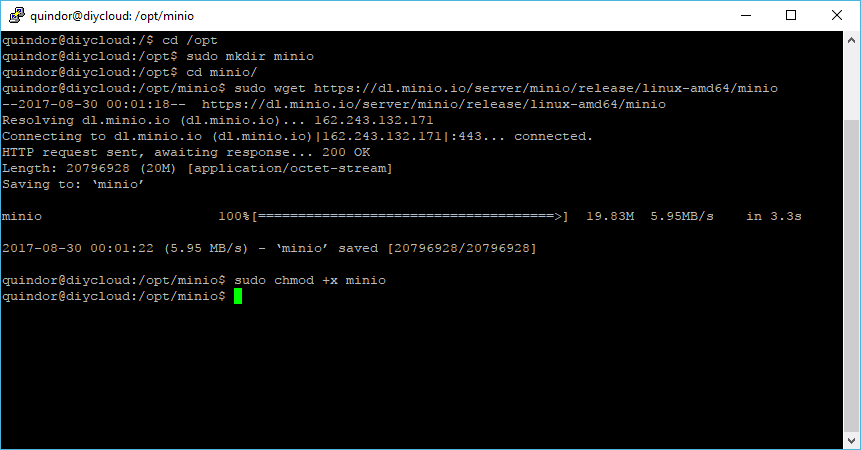](http://blog.quindorian.org/wp-content/uploads/2017/08/19.png)Installing Minio is just downloading it to the right folder and you’re done!## # Starting a test instance of Minio Next we’re going to start a test instance of Minio for the Quindor tenant. While logged in as the minio user inside of the /opt/minio directory, execute the following command: `<pre class="EnlighterJSRAW" data-enlighter-language="null">./minio server --address 0.0.0.0:50001 --config-dir /opt/minio/tenant-configs/quindor /backupstorage/tenants/quindor`After starting and all goes right, the following will display on the screen: [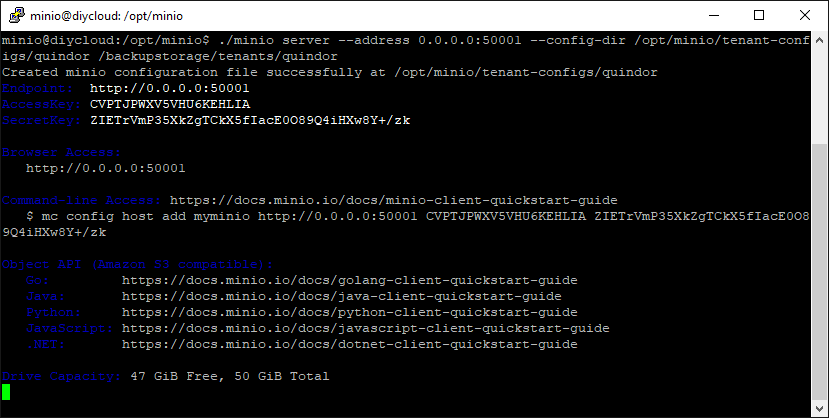](http://blog.quindorian.org/wp-content/uploads/2017/08/1-1.png) Starting the Minio server for a specific tenant the first time generates their Access and Private key. Note them down because you are going to need to pass them on to them and to test the server. Take a webbrowser and go to the static address you gave the machine on the port you started Minio (in this case 50001). Once there, fill in the keys to login. [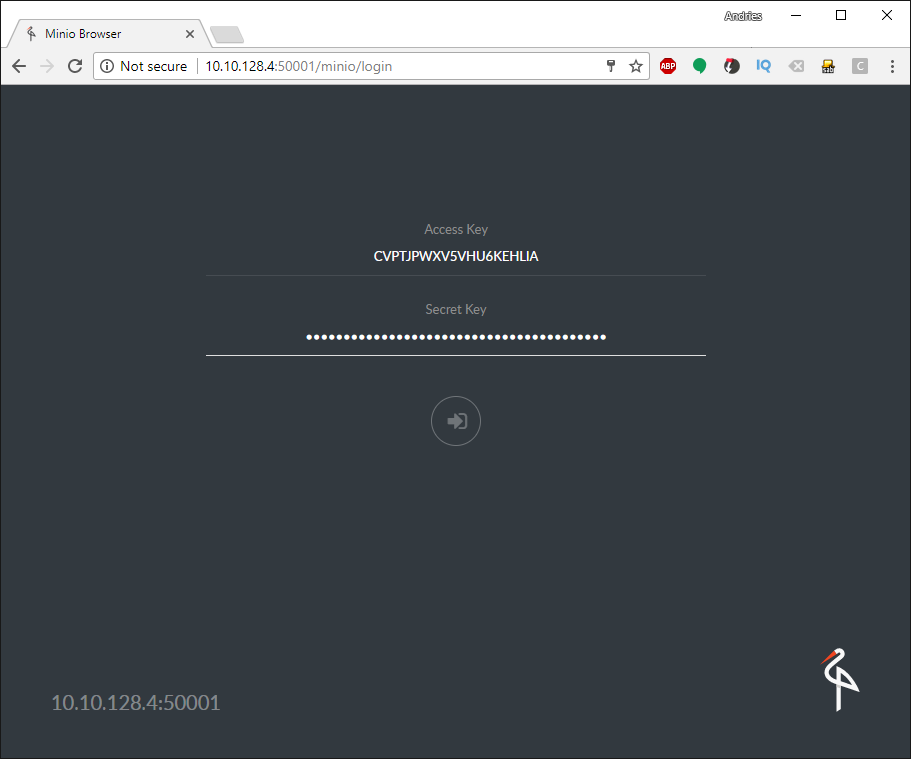](http://blog.quindorian.org/wp-content/uploads/2017/08/2-1.png)Logging in with the Minio S3 storage backend on port 50001 for tenant QuindorOnce logged in we’re greeted with the following screen: [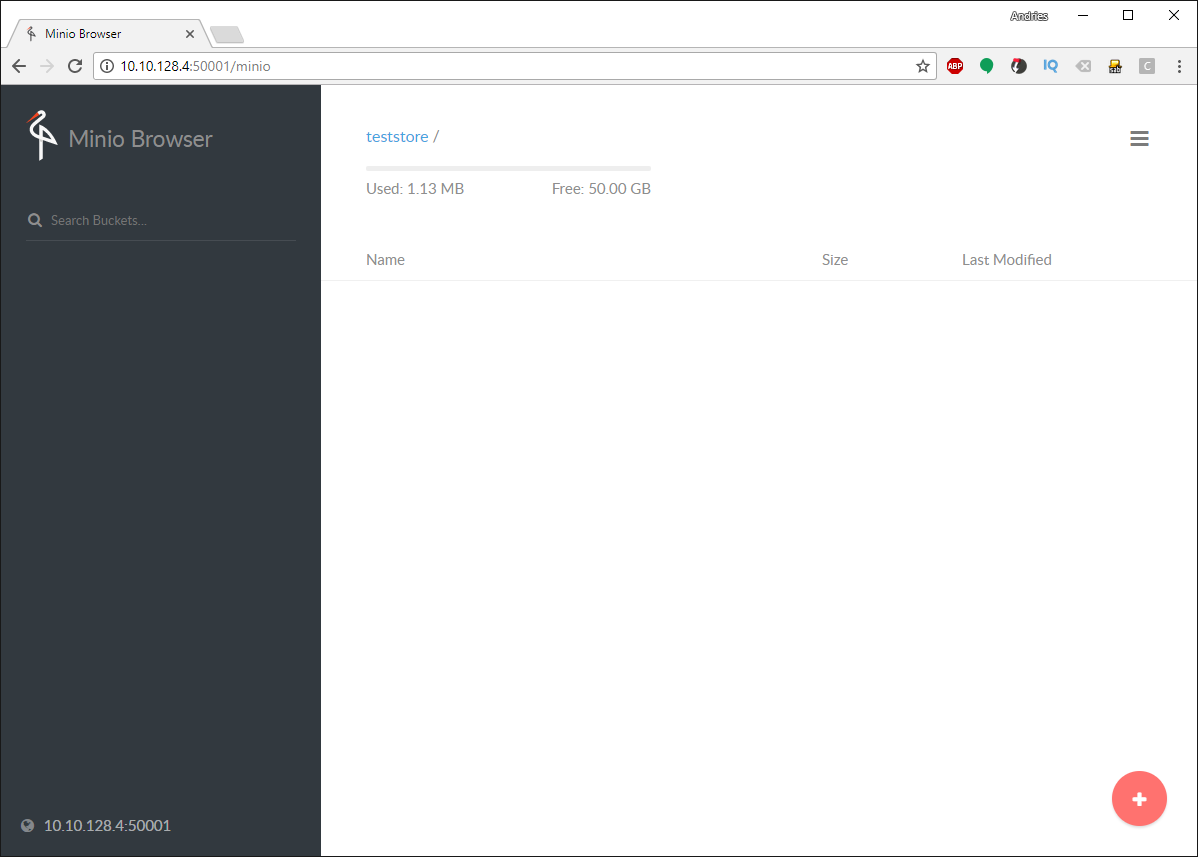](http://blog.quindorian.org/wp-content/uploads/2017/08/3-1.png) Let’s test creating a bucket and uploading a file. Click the red plus button in the bottom right and click the first yellow icon from the bottom, create bucket. [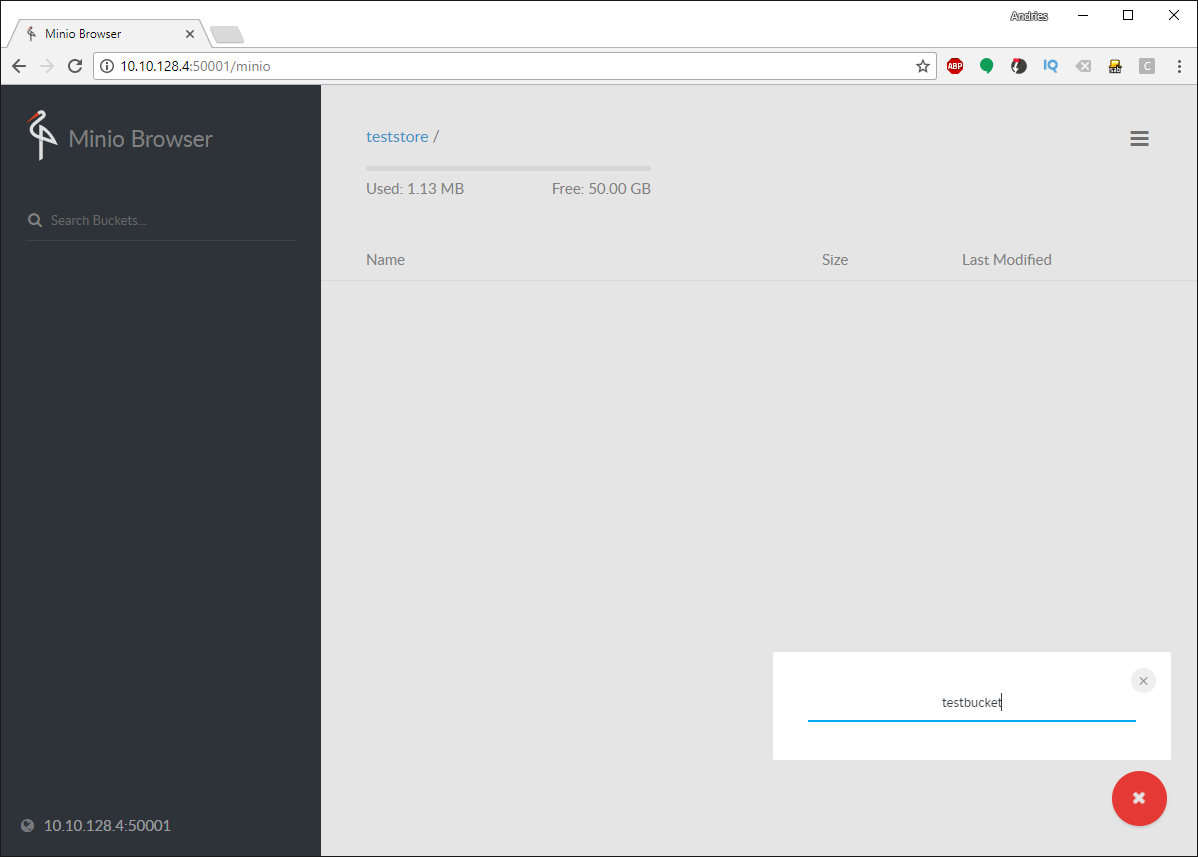](http://blog.quindorian.org/wp-content/uploads/2017/08/4-1.png) Once done, click on the red icon again and select the second yellow icon to upload a file. Once done, you should see the file in the bucket. Note that the tenant can only see the amount of space we set the quota for while the ZFS store has more free space. [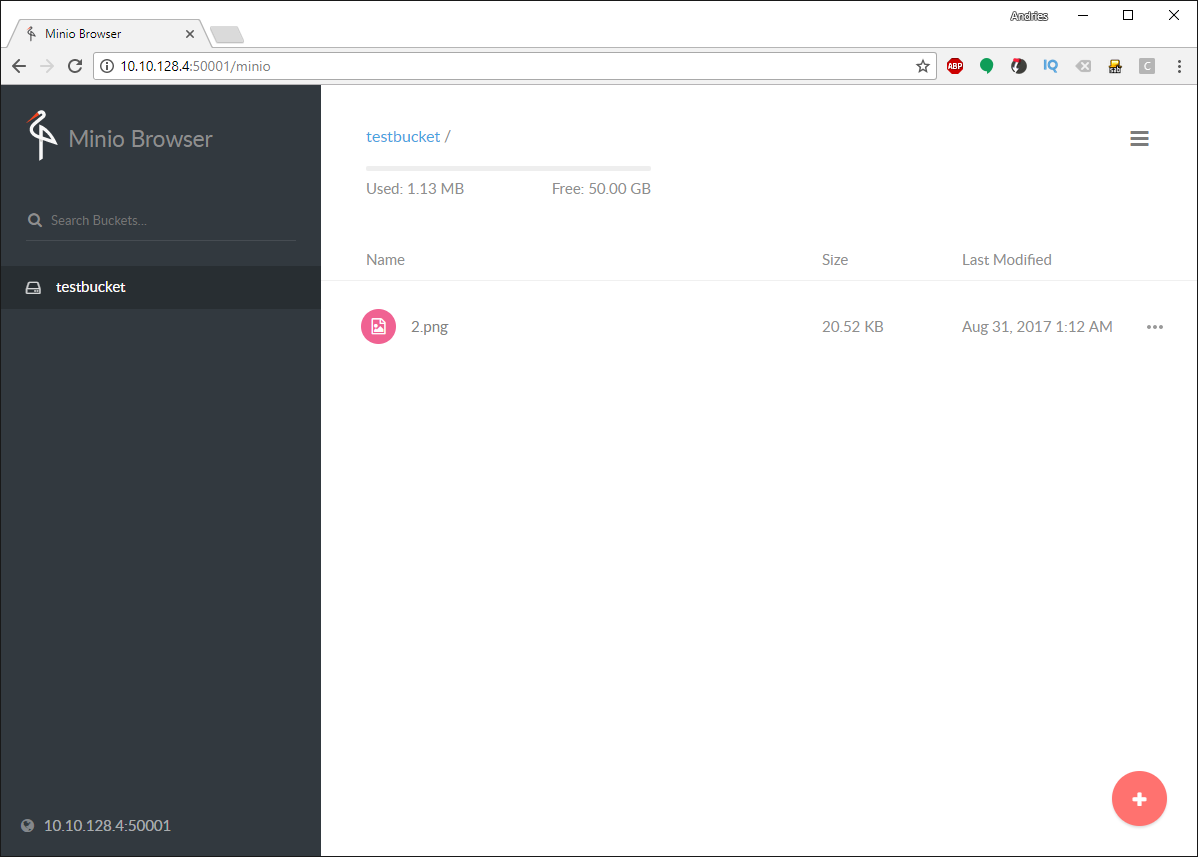](http://blog.quindorian.org/wp-content/uploads/2017/08/5-1.png) Let’s take a look at how that looks on the files system. [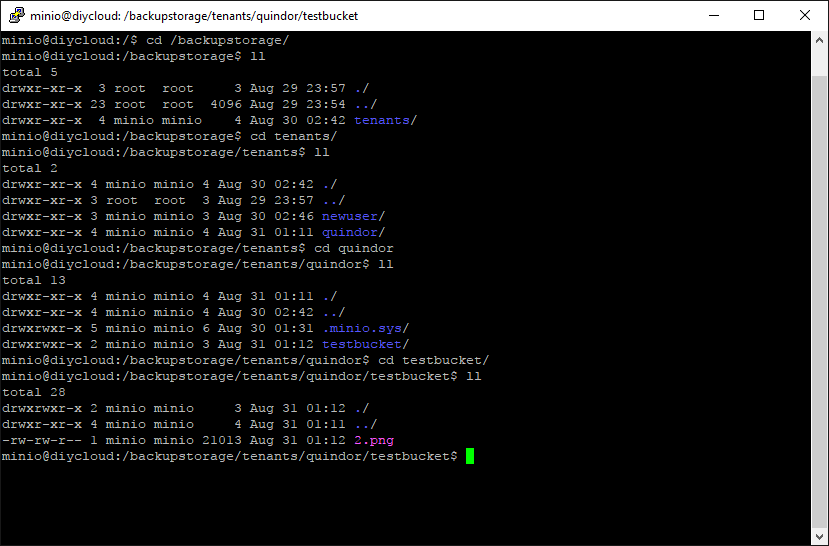](http://blog.quindorian.org/wp-content/uploads/2017/08/6-2.png) As you can see the Minio server is just an S3 front-end for the ZFS datastore we created and the file is deposited on the file system like any regular file. Using it creates a nice front-end per tenant to create their own buckets and see space left. It also keeps the setup very portable and flexible. For instance, we’re going to be using Duplicati 2 to write out backups but if the client wants to use another backup tool and it supports writing into an S3 bucket (most do now), they can use whatever tool they prefer. Autostarting the Minio S3 server(s) =================================== Running the Minio server just in a terminal window is a good way to test it but won’t work if you wish to run this server for a long time. Let’s create some systemd startup scripts to auto-start the Minio server at boot. Make sure you are logged in as the user you created during the install and not the minio user from before, it does not have the rights to become an admin. First we need to create the service file:cd /etc/systemd/system sudo nano minio-quindor.service ```Once you have that file open, enter the following details (with your own info in the right spots!)<pre class="EnlighterJSRAW" data-enlighter-language="null"> # Start-up script for Minio storage backend for DIY cloud backup (http://intermit.tech) [Unit] Description=Minio for tenant Quindor [Service] User=minio ExecStart=/opt/minio/minio server --address 0.0.0.0:50001 --config-dir /opt/minio/tenant-configs/quindor /backupstorage/tenants/quindor [Install] WantedBy=multi-user.target ```After that’s done, run the following commands to enable the service:sudo systemctl enable minio-quindor.service sudo systemctl daemon-reload sudo systemctl start minio-quindor.service ```If everything went correctly, the Minio server for the tenant Quindor should be running in the background:
And there it is, PID 2919 is the server we just started using the service. It should automatically start and stop while booting, etc.
Adding a new tenant
Most of you will have figured it out by now but let’s quickly run through all the steps needed to add another tenant.
Create storage
<pre class="EnlighterJSRAW" data-enlighter-language="null">sudo zfs create backupstorage/tenants/seconduser sudo zfs set quota=50G backupstorage/tenants/seconduser ```##### # Create needed directories and set permissionssudo mkdir /opt/minio/tenant-configs/seconduser sudo chown -R minio:minio /opt/minio/tenant-configs/seconduser/ sudo chown -R minio:minio /backupstorage/tenants/seconduser/ ```##### # Create and start service<pre class="EnlighterJSRAW" data-enlighter-language="null">sudo cp /etc/systemd/system/minio-quindor.service /etc/systemd/system/minio-seconduser.service sudo nano /etc/systemd/system/minio-seconduser.service *replace all quindor references with seconduser* *replace 50001 port with new unique port (50002 for instance)*# Start-up script for Minio storage backend for DIY cloud backup (http://intermit.tech)[Unit]
Description=Minio for tenant seconduser[Service]
User=minio
ExecStart=/opt/minio/minio server --address 0.0.0.0:50002 --config-dir /opt/minio/tenant-configs/seconduser /backupstorage/tenants/seconduser[Install]
WantedBy=multi-user.target<pre class="EnlighterJSRAW" data-enlighter-language="null">sudo systemctl enable minio-seconduser.service sudo systemctl daemon-reload sudo systemctl start minio-seconduser.service ```##### # [](http://blog.quindorian.org/wp-content/uploads/2017/08/7-2.png) ##### # Looking up key for seconduser tenant Since we started the Minio server directly we don’t know which keys where generated. Use this command to look it up: `<pre class="EnlighterJSRAW" data-enlighter-language="null">tail -n 30 /var/log/syslog`[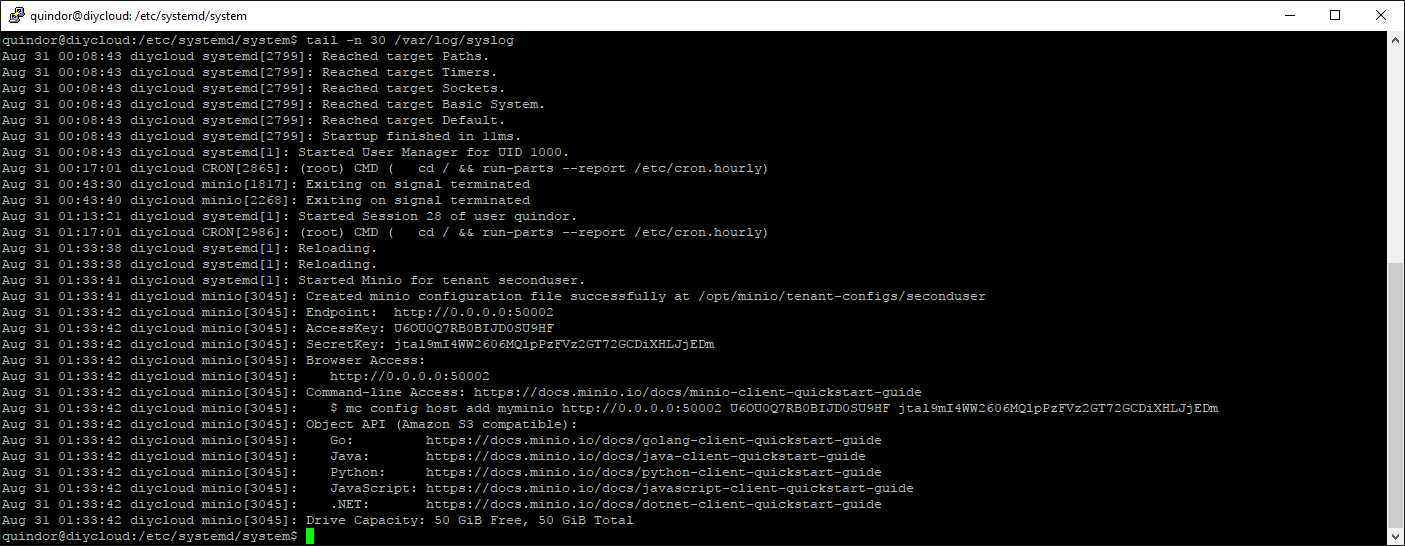](http://blog.quindorian.org/wp-content/uploads/2017/08/8.png) The keys get logged during startup and you need them to provide it to the new tenant, make sure to also include the correct port number for that tenant! Last step, firewall and DNS configuration ========================================= Almost done with configuring the server, we just need to make it accessible over the internet. ##### # Firewall port forwarding Since we’ll be accessing the Minio S3 storage servers over the internet, you need to configure you’re modem/router/firewall to do port forwarding to the server. Each tenant requires 1 TCP port forwarded so if you are expecting multiple in the future, forwarding a block is easiest like 50001-50020. ##### # Static DNS entry You also need to make sure that you’re server is reachable behind a DNS name on the internet. Although connecting directly to the IP number will work, if that IP ever changes you would need to update all your tenants and they would have to update all their clients, so setting a static DNS name (even to a dynamic IP) is a smart move! If you don’t own a domain with which you can create a DNS name, look into using one of the Dynamic DNS providers. Some have linux clients you can install on the server to automatically update the DNS record if the client IP changes! All done, next up, installing and configuring the client! ========================================================= And that ends this post about DIY cloud backup, the server chapter. Hopefully I’ve explained everything you need to know to get your own server and Minio instances up and running. Leave a comment down below what you thought of it and if maybe something needs to be added or changed! Click here to go to the next post, installing and configuring the client software! Please follow and like us: [](http://twitter.com/share) [](https://www.pinterest.com/pin/create/button/?url=&media=&description=) var addthis_config = { url: "http://blog.quindorian.org/2017/08/diy-cloud-backup-installing-configuring-server.html/", title: "DIY cloud backup: Installing and configuring the server" } [](#)
Leave DIY cloud backup: Installing and configuring the server to:

Best Posts From quindor
We have not curated any of quindor's posts yet. But you can encourage our curation team to review posts by visiting them regularly and by referring other readers. Because we give priority to frequently read content.
More Posts From quindor
- Review: Tronsmart 3 port Quick Charge (TS-WC3PC) phone charger
- DIY cloud backup: How to perform a Duplicati Restore and Tips and Tricks
- DIY Cloud Backup: Installing and configuring a client
- DIY cloud backup: Installing and configuring the server
- DIY cloud backup: Replacing CrashPlan Home Family DIY style