
Ability strategy analysis: Redemption
Introduction
This week’s post is all about the Redemption ability! When a unit with Redemption dies, it deals 1 damage to all enemy units.
I’ll admit, it’s not a strategy I use often. Back in the day, though, there were some epic Redemption plays. Imagine stacking multiple Redemption units in your lineup, pairing them with Resurrect, and watching the chaos unfold—serious extra damage everywhere!
These days, I don’t see this strategy as much. Maybe it’s fallen out of favor or just doesn’t hold up in the higher leagues.
But enough reminiscing—let’s dive into the post!

Ability
When this Unit dies, it does 1 damage to all enemy Units.
Note:
The damage dealt follows the rules of melee attacks and strikes armor first.
Official ability information from splinterlands: List abilities
Synergies / strategy
Abilities benefits
 Protect - Give all units some extra armor to absorb the damage from the redemption (of your opponent)
 resurrect - When a redemption unit is resurrected it can trigger the redemption again dealing 2 damage to all units.
Ruleset benefits

 Earthquake / Noxious Fumes - Both rulesets can help trigger your redemption quicker.
Ruleset to be aware off
 Holy Protection - This gives all units divine shield this might hinder your redemption just taking down all divine shield.
Select / favorite
Mine redemption units:
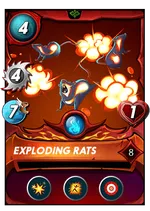

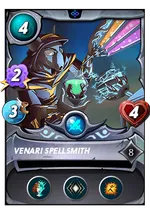
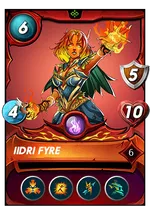
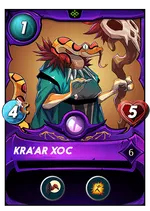
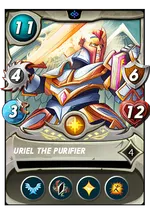
For redemption i like this unit the most, its not my most selected redemption unit but this has a decent win rate. Because its a neutral its versatile and the best reason be my number one for the redemption ability
More specific stats for mine Venari Spellsmith:
Strategy
Medium mana battle with two restrictive ruleset no range and only units that cost 4 mana or less
Rulesets

Fog of War:
Units lose Sneak, Snipe, and Opportunity.

Broken Arrows:
You cannot summon units with ranged attacks.

Little League:
You can only summon units and summoners that cost 4 or less mana.
The Lineup
Summoner
| Card | Reason |
|---|---|
 | This time we select Tarsa because i need to select some melee units because no ranged units can be selected. |
Units Lineup
| #1 | #2 | #3 | #4 | #5 | #6 |
|---|---|---|---|---|---|
|  |  |  | |  |
Exploding Rats (lvl 8)
My first redemption unit that is meant to be killed quickly with only one health. Note that the high speed has a nice possibility to be missed (if not magic is used).
Its often a nice strategy when you ca place multiple redemption units so there will more damage when units are killed.
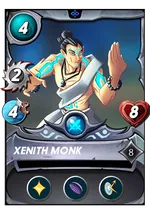
Xenith Monk (lvl 8)
Second unit where the magic reflect and heal are important. Baucse there will be no ranged units i expect some magic units.
This in combination with the amplify of the Venari Spellsmith this magic reflect does some extra return damage.
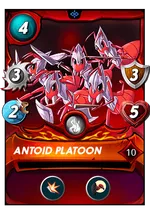
Antoid Platoon (lvl 10)
When the first two melee units are health this has gained some extra health so it can tank and protect my magic damage units.
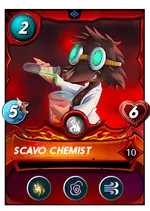
Scavo Chemist (lvl 10)
This unit is in the team for the health so it can protect my magic unit even longer.
The slow will increase the miss change on my Exploding Rats.
Venari Spellsmith (lvl 8)
Star of this week. Selected for the redemption but also for amplify and the magic damage so it can attack from this position.
Doctor Blight (lvl 4)
Love this unit with the scavenger it will gain health health when is at the front it has a at least +5 health. Then it will also gain health on killed enemies.
Also the poison is a very strong ability with little league rule set.
The Battle
Reference
Link to the battle:
Link to battle
Rounds
Start :
Alright, let’s break this down. My opponent made an interesting choice with their summoner—it gives a -1 ranged debuff, but with the Broken Arrows ruleset in play, that effect is totally irrelevant. I’m guessing they went with this summoner for the Dragon element to open up more unit options.
On my side, I feel like I’ve got an edge with Doctor Blight placed at the back. It’s a great position for it to soak up health and become a real problem for my opponent as the battle progresses.
Also my opponent got many magic units so the magic reflect will be helpful.
Let’s see how this match unfolds—anything can happen in the arena!
Round 1:
The first round is in the books! My Redemption ability really came through, dealing 1 damage to every enemy unit—it’s always satisfying to see that. On top of that, the magic attacks hit even harder thanks to the Amplify effect from my Venari Spellsmith. That extra magic damage is already starting to show its value. Things are off to a solid start!
Round 2:
What a chaotic turn of events! Losing my Venari Spellsmith triggered Redemption, which took out my opponent’s Venari Spellsmith. That, in turn, triggered their Redemption. It’s like a chain reaction of destruction—fun to watch for sure!
Right now, it’s looking pretty even, with both sides having almost the same total hit points. Still, I’m confident that my Doctor Blight’s positioning will make the difference. It’s in a prime spot to stack health and carry me to victory. Let’s see how this plays out!
Round 3:
Unfortunately, my Antoid Platoon got poisoned, but the good news is my opponent is down to their last unit. Even better, that unit can’t attack, so I’ve got no reason to stress. If my Doctor Blight lands a poison on it, the match will be over in one or two rounds. The pressure is on them now—it’s just a matter of time!
Round 4:
Oh, I totally forgot about Scavo Chemist’s Cleanse ability! It’s hilarious, though—it applied the poison damage to my Antoid Platoon before cleansing the poison. 🤣 Classic bad timing!
I didn’t manage to land my poison this round, but no big deal—my opponent’s last unit is hanging on by a thread with just 1 health point left. Victory is within reach!
Round 5:
At this point, it’s all over but the shouting. My opponent’s last unit can’t attack, so there’s nothing they can do to turn this around. It’s just a matter of finishing things off now. A solid win in the bag!
Round 6:
Victory!
Conclusion
Redemption can be a powerful strategy, though it’s not one I usually build my team around just for that ability. That said, I’ve seen some exciting low-league, low-mana matches where players stacked three or more Redemption units for devastating results. It’s definitely something to keep in mind when building your lineups!
If you’ve enjoyed this post, be sure to check out my other write-ups on different abilities. I hope they’re both fun to read and informative for your own Splinterlands battles. Let me know what you think—I’d love to hear your feedback!
Previous ability strategy posts
Below you will find references to the other ability strategies / analysis posts.
 Affliction
 Amplify
 Backfire
 Blast
Blast Blind
Blind Bloodlust
 Camouflage
 Conscript
 Close Range
 Cleanse
 Cripple
 Deathblow
 Demoralize
 Dispel
 Divine Shield
 Dodge
Dodge Double Strike
 Enrage
 Flying
 Forcefield
 Fury
Fury Giant Killer
 Halving
 Headwinds
 Heal
Heal Tank Heal
 Immunity
 Inspire
 Knock Out
 Last Stand
 Life Leech
 Magic Reflect
 Martyr
 Opportunity
 Oppress
 Phase
Phase Piercing
 Poison
 Reach
Reach Recharge
 Redemption
That's all for this week hope you enjoyed reading this ability strategy/analysis. See you all on the battlefield.
Do you also want to be part of this amazing play to earn game consider using my referral link.
Leave Ability strategy analysis: Redemption to:

Best Posts From Beaker
We have not curated any of beaker007's posts yet. But you can encourage our curation team to review posts by visiting them regularly and by referring other readers. Because we give priority to frequently read content.
More Posts From Beaker
- Season 186 - Splinterlands Season Report
- SPL-Stats: Small Bug Fix Update
- Spl-stats: Marketplace expansion with a brand new Skins page
- spl-stats: Boom!!! Combine Cards Has Arrived
- Spl-stats site update: Preparing for Modern Brackets with the new Buy Missing CC tool
- Small update for the #Splinterlands Land Manager!
- How Lucky Are You Really? Fortune Winners Arrive on spl-stats.com
- Land Site: Supporting Visions of Verico
- Land Manager Update, Buy and Stake Workers Arrives!
- Season 184 Splinterlands Report for @beaker007, @shinoumonk