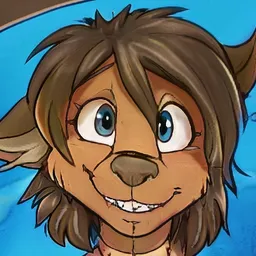
How To Generate A Kitsune Portrait Using Stable Diffusion
Here's step-by-step on how to use Stable Diffusion to make this portrait:
It's current as of Sept 2022. This matters because AI art generation changes move at hyperspeed.
You will need the following items to complete this tutorial:
- HuggingFace account (https://huggingface.co).
- Colab account (https://colab.research.google.com/) I use the $9.99/month Pro account. Free account should work but will be slower.
Optional but nice to have:
- Gimp (https://www.gimp.org/) or your image editor of choice
- Topaz Gigapixel (https://www.topazlabs.com/gigapixel-ai)
WELL worth the $99.99 it currently costs.
Stuff That's Good To Know If You're An AI Art Newbie:
- If you can click buttons and use your brain, you CAN do this.
- You'll use Colab to do the bulk of the work. Colab is Google's interactive-worksheet-thingy. You don't need to code nor need to know HOW to code. DO NOT BE INTIMIDATED.
- A lot of AI workflows are feeding the images from one AI into another AI to do different stuff. There's no general purpose one-size fits all tool. Yet.
- I am TOTALLY fine with you starting from my work. Go nuts. Seriously. The fact that you're reading this and moving your own skills forward is a net gain for the world; if you can use this as a springboard to get better, then right on.
Tutorial
1) Click the Stable Diffusion Using Diffusers Colab, https://colab.research.google.com/github/huggingface/notebooks/blob/main/diffusers/stable_diffusion.ipynb
2) If the top right of the screen doesn't say Connected or RAM/Disk, choose the little arrow near Reconnect, and choose Connect to a hosted runtime at the top of the screen, here:
3) Run the first Setup item in the Colab. To do this, hover your mouse cursor over the [ ] bracket by !nvidia-smi, and it'll change to a Play symbol. Click it, let it run - a green checkmark will appear next to it when it's done.
will become
You can ignore all of the other stuff returned other than the checkmark.
4) Run the second Setup item in the Colab and get the green checkmark..
5) Run the third Setup item in the Colab and get the green checkmark..
6) Run the last Setup item in the Colab, and it'll pop this message up. Click on the blue link, and go to your Hugging Face account (you did set one up, right ?!?)
7) A new tab will appear, and jump to your Hugging Face account. Click the New Token button. Set the Name to stable diffusion and the Role to write, then click Generate a token:
9) The token will appear. Click the Copy To Clipboard icon, next to Show, here:
10) Go back to Colab and paste the token here by clicking in the Token window, then hitting Ctrl-V:
then click Login button underneath. It'll tell you Login successful, then Authenticated...you can ignore the rest.
11) Run the first Stable Diffusion item in the Colab and get the green checkmark. This will take a few minutes and show a bunch of progress bars.
12) Run the second Stable Diffusion item in the Colab and get the green checkmark.
13) Take a close look at the third Stable Diffusion item. See the text in quotes next to prompt? It'll be something like astronaut on a horse.
Click on it, and change its text to
aesthetic character portrait of a beautiful female anthro kitsune with a cute beautiful attractive detailed furry face in the ruined future city, fantasy artwork, award winning, hyper detailed, studio lighting, artstation
Make sure you left the quotes surrounding the text - it should look like this:
Run this item, and get the green checkmark. Oh, and also a kitsune of random varying quality!
To be crystal clear - the prompt is what matters, and you can change the prompt to ANYTHING you want, as long as it's basically SFW. (This Colab will automatically remove images it deems NSFW.)
Rerun this item a few times, and notice that your kitsune is changing each time. Some are crap, some are amazing. Get used to that.
14) Take a close look at the fourth Stable Diffusion item. See the number after manual_seed? That's a magic number that tells Stable Diffusion:
Hey, I want a consistent image, not one that changes each time.
Set that number to 50. Run this item. You'll get a different critter:
Rerun this item a few times, and notice that your kitsune is the same each time now.
15) Let's now make a nice template that you can generate great looking critters off of. Click the last kitsune pictures, then click +Code at the top of the screen.
This will insert a new code section that's empty:
16) Copy the code below, then paste it into that new code section, then run that code section.
This code will generate 6 kitsunes using the same manual_seed values we used earlier...
from PIL import Image
from torch import autocast

def image_grid(imgs, rows, cols):
    assert len(imgs) == rows*cols

    w, h = imgs[0].size
    grid = Image.new('RGB', size=(cols*w, rows*h))
    grid_w, grid_h = grid.size

    for i, img in enumerate(imgs):
        grid.paste(img, box=(i%cols*w, i//cols*h))
    return grid

num_cols = 3
num_rows = 2

prompt = ["aesthetic character portrait of a beautiful female anthro kitsune with a cute beautiful attractive detailed furry face in the ruined future city, fantasy artwork, award winning, hyper detailed, studio lighting, artstation"] * num_cols
generator = torch.Generator("cuda").manual_seed(50)

all_images = []
for i in range(num_rows):
  with autocast("cuda"):
    images = pipe(prompt, height=512, width=512, num_inference_steps=100, generator=generator)["sample"]
  all_images.extend(images)

grid = image_grid(all_images, rows=num_rows, cols=num_cols)
grid
17) Wait a bit, and snag your kitsune file by right clicking it, and choose Download. Save it somewhere on your drive that you can dork with it.
18) Notice the kitsune needs a bit more work. There's something funky back by the right ear, another weird string by the left shoulder, and the whiskers are all dorked up:
AI's get close, but they never get it 100% right IMO, so you have to do a bit of cleanup. Sooooo ANOTHER AI WILL JUST DO THE CLEANUP FOR US. Sound good?
You're damn right it does..we live in amazing times.
19) In a web browser, go to https://cleanup.pictures, and upload the kitsune file you just saved to your drive, here:
20) Scrub the green brush over the stuff you hate, it'll erase it (sometimes it takes multiple tries):
Erase the dorked up whiskers by dragging the Brush icon to the left to make it smaller. Get rid of the weird ones, keep the good ones. If you screw up (you will), hit Ctrl-Z to undo the previous step.
21) Click the Download button in the top right of the screen, and save the cleaned up kitsune to your hard drive.
YOU ARE DONE. GOOD JOB. NOW GO MAKE SOME GREAT STUFF AND SHOW IT TO THE WORLD.
(Optional) 22) Throw it into Topaz Gigapixel, and choose 2x to upscale it. I find 2x does the best job, but 4x is pretty great too. Low Resolution mode works best in my opinion with Standard Diffusion generated images, but YMMV depending on subject matter. Note this is the *third *AI in the chain...nuts huh?
(Optional) 23) Save the file out, throw it into GIMP, and add your signature.
Further Voyages Into Cool Stuff:
Start messing with the following values in that code block you pasted.
First, prompt. You can turn this into anything you want.
I strongly recommend Lexica (https://lexica.art) to see what others have done and learn from them.
Second, seed. Did you get 6 crappy kitsunes? Change this to any other number to get something different and do it again.
Third, inference_steps. The lower this number, the faster and crappier the image will be. The higher this number, the slower and more refined the image will be. 50 is the default.
One tip: Just because the number is higher, it doesn't always mean the image is better. If you try doing this kitsune with 500, it starts doing Real Weird Stuff with her neck.
Last, height and width for image resolution.
You don't have to generate square images any more. Wide landscapes? Easy, pick width=1024, and height=256. Cool portraits? Do the reverse, width=256, height=1024.
You DO have to pick numbers that are powers of two (so 1, 2, 4, 8, 16, 32, 64, 128, 256, 512, 1024, 2048 etc...) or the Colab will die horribly. Also if you set numbers that are too high, you'll hit an error sooner or later (see below) I recommend using Topaz Gigapixel if you want a higher res image.
OH NO I HIT AN ERROR WHAT DO I DO OH GOD
Getting an error in Colab that's complaining about memory in bright red?
In the Colab, choose Tools > Disconnect And Delete Runtime, and start from 1) again. If you still get it, do Tools > Disconnect And Delete Runtime again, change these numbers in that code you pasted, to 1 and 1:
and start from 1) again.
Ugh My Stuff Looks Terrible What Am I Doing Wrong?
Go to Lexica (https://lexica.art), and enter a single keyword that you're wanting to generate - wolf, robot, tornado, etc - and look at prompts that others have done. Use those prompts as your starting point.
Leave How To Generate A Kitsune Portrait Using Stable Diffusion to:
Best Posts From mightyweasel
We have not curated any of mightyweasel's posts yet. But you can encourage our curation team to review posts by visiting them regularly and by referring other readers. Because we give priority to frequently read content.