
NodeMCU + 0.92inch I2C OLED display : bouncing ball
Download and Install Library
아래 사이트에서 라이브러리를 다운로드 해서 아두이노 라이브러리 폴더에 복사하자.
https://github.com/squix78/esp8266-oled-ssd1306
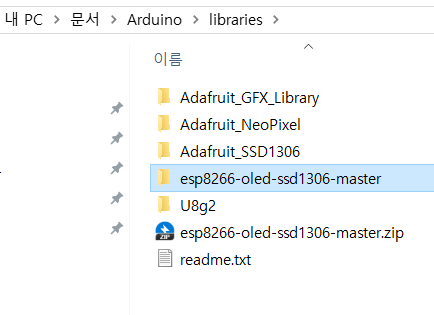
예제 파일을 열어 보자.
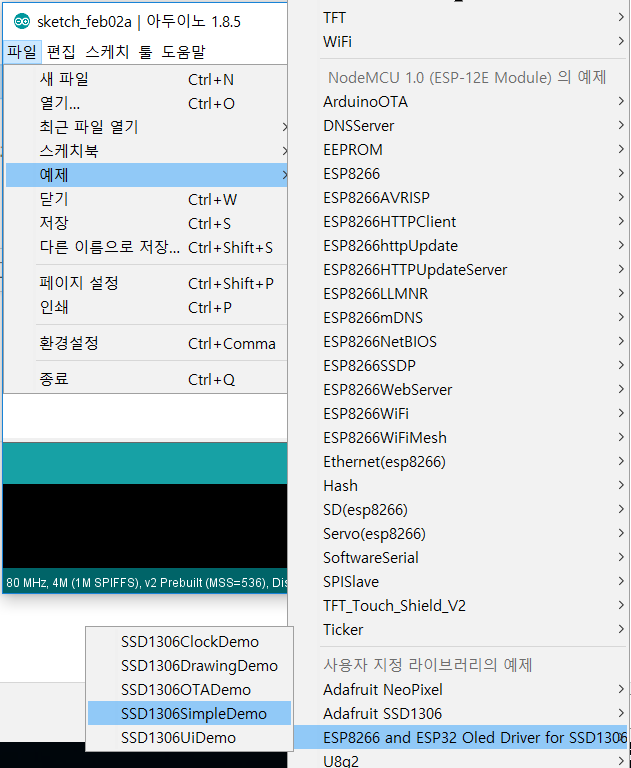
연결된 자신의 핀번호로 수정한다.
(SSD1306 - NodeMCU)
GND - GND
Vcc - 3V
SCL - D1
SCA - D2

예제들을 각각 실행해 보자.
그리고 사용하지 않는 것들을 모두 삭제한다. 이제 간단하게 서클을 하나 그리고 바운싱 되도록 해보자.
#include <Wire.h> // Only needed for Arduino 1.6.5 and earlier
#include "SSD1306.h" // alias for #include "SSD1306Wire.h"
// Include custom images
//#include "images.h"
// Initialize the OLED display using Wire library
SSD1306 display(0x3c, D2, D1);//D1는 SCK(SCL), D2는 SCA과 연결한다.
int w = 128;
int h = 64;
int rad = 10;
float xpos, ypos;
float xspeed = random(1,3.0);
float yspeed = random(1,2.0);
int xdirection = 1;
int ydirection = 1;
void setup() {
Serial.begin(115200);
Serial.println();
Serial.println();
xpos = w/2;
ypos = h/2;
// Initialising the UI will init the display too.
display.init();
display.flipScreenVertically();
display.setFont(ArialMT_Plain_10);
display.clear();
}
void loop() {
// clear the display
display.clear();
//update the position of circle
xpos = xpos + (xspeed * xdirection);
ypos = ypos + (yspeed * ydirection);
Serial.println(rad);
//revers its direction
if (xpos > w -rad){
xpos = w-rad;
xdirection *= -1;
xspeed = random(1,3.0);
}
if (xpos < rad){
xpos = rad;
xdirection *= -1;
xspeed = random(1,3.0);
}
if (ypos > h - rad ) {
ypos = h-rad;
ydirection *= -1;
xspeed = random(1,2.0);
}
if(ypos < rad){
ypos = rad;
ydirection *= -1;
xspeed = random(1,2.0);
}
//draw circle
display.drawString(w/2-5, h/2-5, "Hello");
display.fillCircle(xpos, ypos, rad);
display.display();
delay(10);
}
업로드 하고 실행시켜 해보자.
Leave NodeMCU + 0.92inch I2C OLED display : bouncing ball to:

Best Posts From jseee
We have not curated any of jseee's posts yet. But you can encourage our curation team to review posts by visiting them regularly and by referring other readers. Because we give priority to frequently read content.