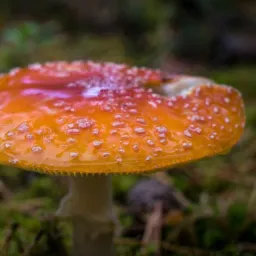
Photo designer for myself
His sword could not bear the load, the shield fell apart. The tired warrior went into hand-to-hand combat. Does anyone want to fight him? Maybe on daggers?
Do not pay attention, it was a joke. The warrior worked as a model this time. But I'll tell you everything in order.
Его меч не выдержал нагрузки, щит раскололся на части. Усталый воин вышел в рукопашный бой. Кто-нибудь хочет с ним сразиться? Может быть на кинжалах?
Не обращайте внимания, это была шутка. Воин работал фотомоделью в этот раз. Но расскажу всё по-порядку.
After the magic kick from 

Appetite comes with eating and I have it. I picked up a lens from a children's slide projector. I can not imagine a simpler lens. Two magnifying glasses and two tubes.
После волшебного пинка от
Аппетит приходит во время еды и он у меня появился. Я взял в руки объектив от детского диапроектора. Более простого объектива я не могу себе представить. Два увеличительных стекла и две трубки.
As you can see, everything is very simple. I removed the regular lens from the camera and with one hand applied this toy to the right place. But there is one subtlety. Both glasses have a bulge in one direction, while the other side is flat.
For this reason, we can get four options for assembling this lens: both bulges outward, both bulges inward and mixed in one and the other.
Each time I took a control shot for later comparison. These pictures are shown below.
Как видите, всё очень просто. Я снимал штатный объектив с камеры и одной рукой прикладывал эту игрушку к нужному месту. Но здесь есть одна тонкость. Оба стекла имеют выпуклость в одну сторону, при этом другая сторона плоская.
По этой причине мы можем получить четыре варианта сборки этого объектива: обе выпуклости наружу, обе выпуклости внутрь и смешанно в одну и другую стороны.
Каждый раз я делал контрольный снимок для последующего сравнения. Эти снимки приведены ниже.
ISO100 1/80
Photos are presented without processing. I also did not choose a plot or anything else. This is just a test photo with a small figure fit into the frame. At the same time, the figure does not have a contrasting color and a clear geometry. If you slightly adjust the basic settings, you can get a more pronounced form.
Фотографии представлены без обработки. Я также не выбирал сюжет или что-то ещё. Это просто тестовое фото с маленькой фигуркой поместившейся в кадр. При этом фигурка не имеет контрастной расцветки и чёткой геометрии. Если немного подкорректировать базовые настройки, то можно получить более выраженную форму.
Then I found another figure and at the same time brought the lens closer to the matrix. This allowed to put a larger figure at a farther distance from the camera..
Потом я нашёл другую фигурку и при этом приблизил объектив к матрице. Это позволило поставить более крупную фигурку на более дальнее расстояние от камеры.
Of course, I could not resist and instead of this lens I tried to put a pinhole. It turned out a curious result. But that's another topic.
Конечно, я не удержался и вместо этого объектива попробовал поставить пинхол. Получился любопытный результат. Но это уже другая тема.
To be continued...
From Russia with Love
My last posts
Leave Photo designer for myself to:

Best Posts From bambuka
We have not curated any of bambuka's posts yet. But you can encourage our curation team to review posts by visiting them regularly and by referring other readers. Because we give priority to frequently read content.